| Chapter 5. Defining a Region of Interest (ROI) | ||
|---|---|---|
 |  | |
| Chapter 5. Defining a Region of Interest (ROI) | ||
|---|---|---|
| | | |
Table of Contents
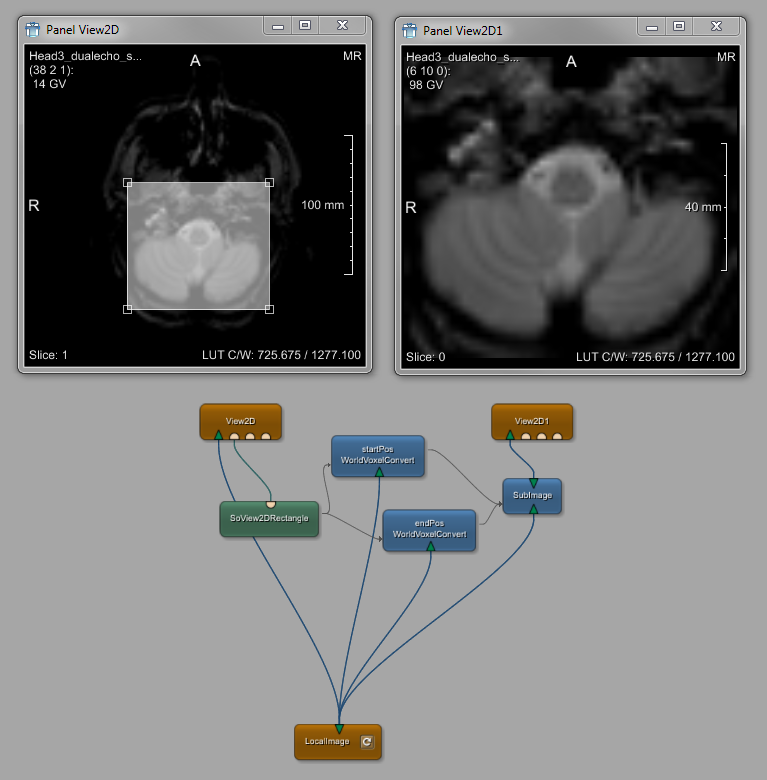
In the following chapter, we will walk through the creation of a network that allows defining a 2D region of interest (ROI), that is by selecting a region of the image in the first viewer, the selected region is displayed as a subimage in a second viewer.
The resulting network looks as follows:
In this chapter, we will use the terms “world position” (absolute) and “voxel position” (relative to the image), which are discussed in detail in the chapter Chapter 12, Excursion: Image Processing in ML.
The first part is building a simple network with an image load module, a viewer, and a module that allows for drawing a selection rectangle.
Add LocalImage and the View2D module to the new network and connect their image connectors.
Double-click on LocalImage to open the panel, and select the image Head3_dualecho.small.dcm for this example. Load the image.
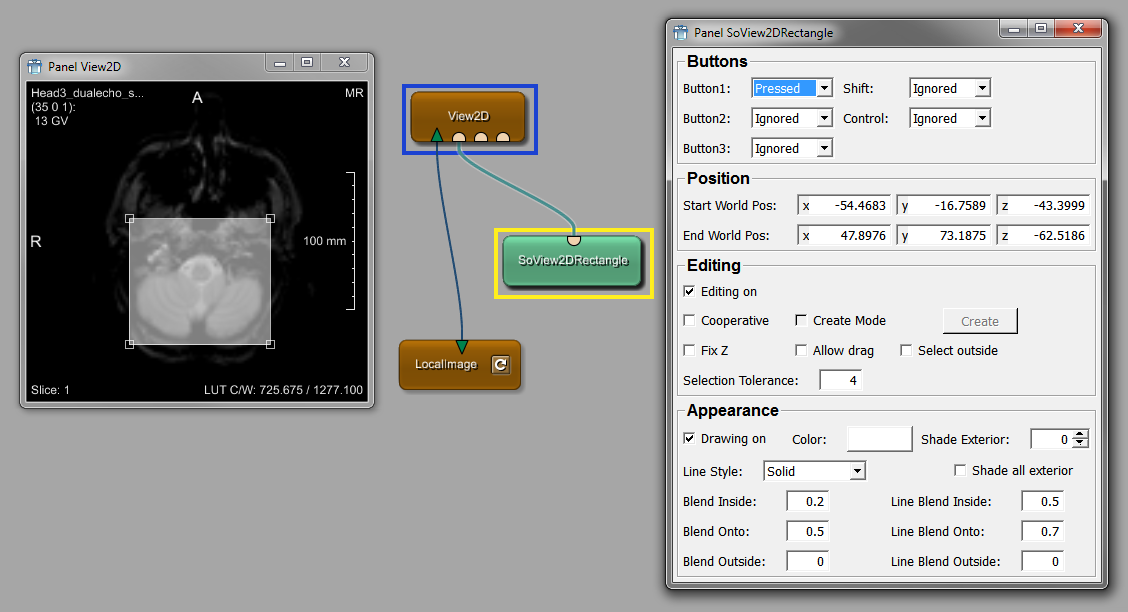
Add the Open Inventor module SoView2DRectangle and connect its output to the first View2D Open Inventor input connector.
The module help offers the following purpose for the module: “The SoView2DRectangle module allows for a drawing and interactive adjustment of a 2D rectangle in a 2D viewer. Note: Although this module is called SoView2DRectangle, it actually draws a 3D box.” (The latter is the reason why the world positions are given in 3D.)
Double-click on SoView2DRectangle to open its panel. For displaying the subimage, the world positions will be crucial.
© 2026 MeVis Medical Solutions AG
| | | |
| 4.3. Parameter Connection for Synchronization |  | 5.2. Adding a Second Viewer for the Subimage |