| Chapter 1. Integrating MeVisLab with OsiriX | ||
|---|---|---|
 |  | |
| Chapter 1. Integrating MeVisLab with OsiriX | ||
|---|---|---|
| | | |
Table of Contents
The following sections explain the setup and adoption of the OsiriX MeVisLab bridge for your MeVisLab installation.
The bridge between MeVisLab and OsiriX consists of the OsiriX plugin OsiriXMeVisLabBridge and the MeVisLab module OsiriXBridge. Currently, MeVisLab and OsiriX must be running on the same computer.
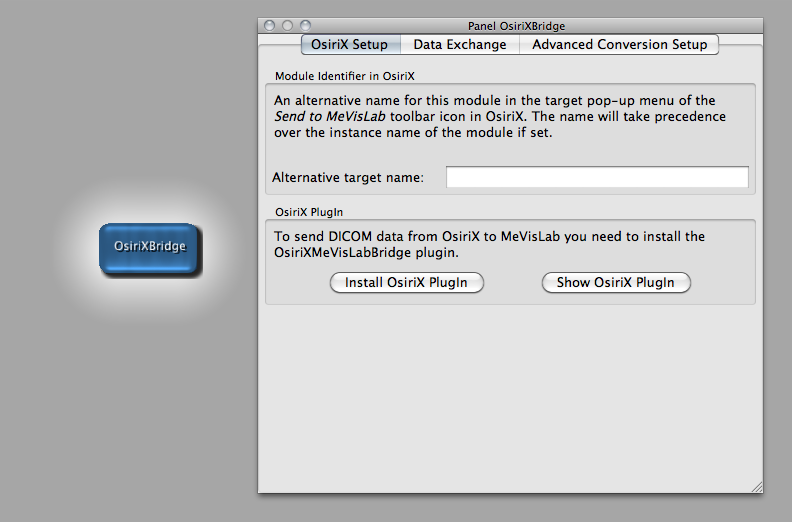
To install the OsiriX plugin, start MeVisLab, place the module OsiriXBridge onto the network window and open its panel by double-clicking the module. The OsiriX Setup tab features an Install OsiriX PlugIn button, that will hand the plugin to OsiriX for installation (Figure 1.1, “Installation of the OsiriX plugin via the MeVisLab module OsiriXBridge”).
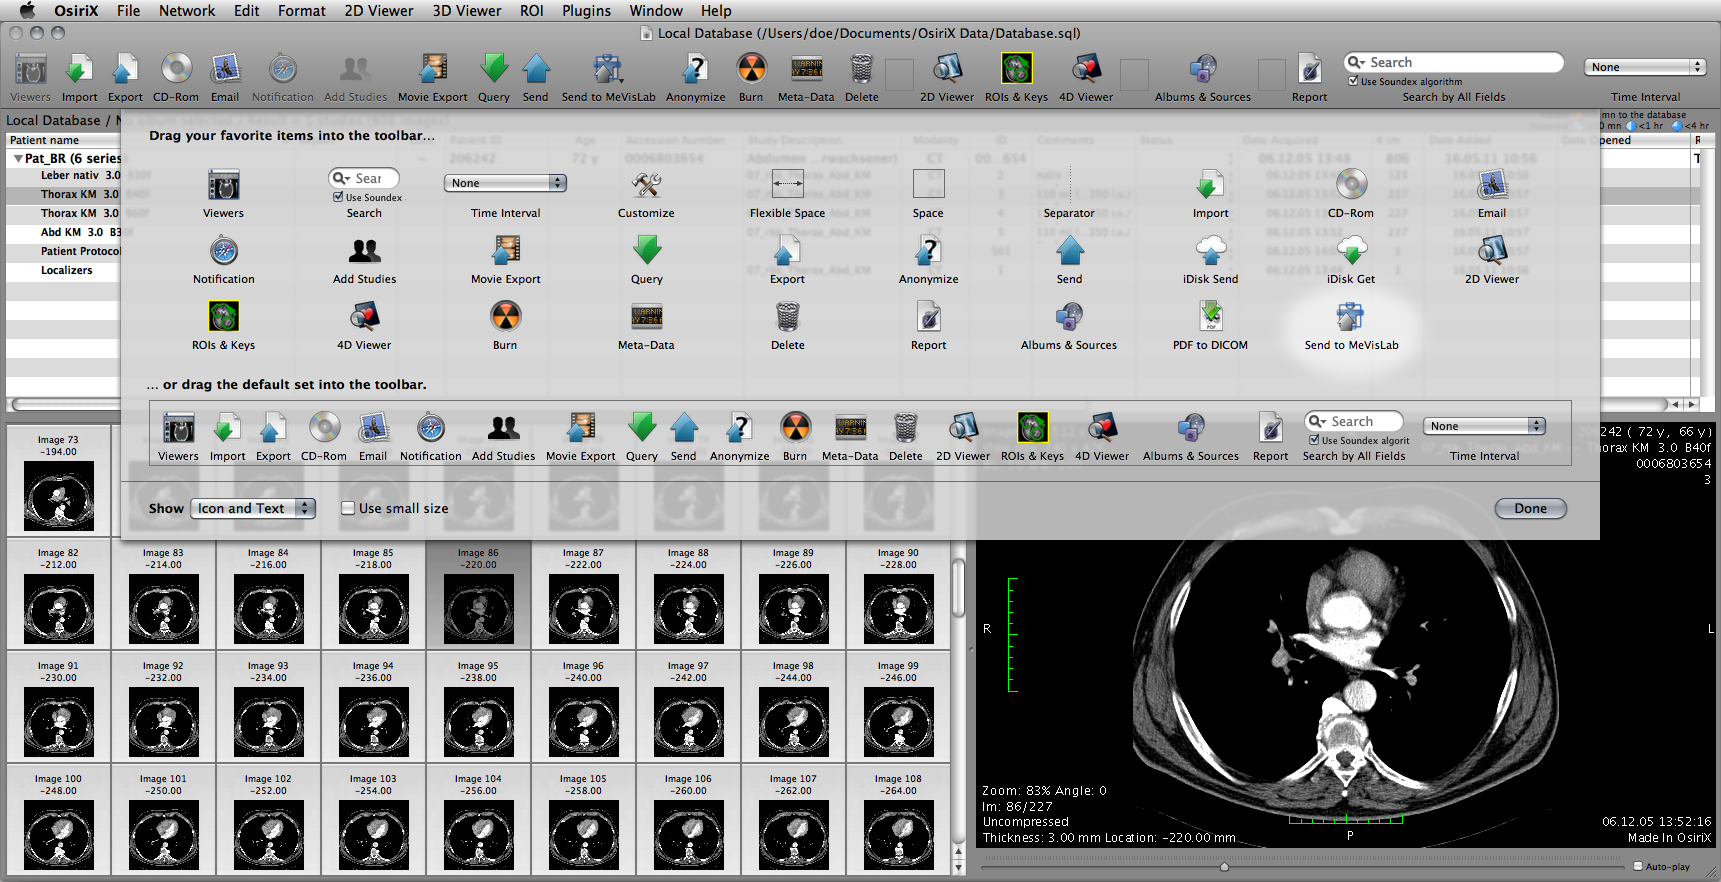
After the OsiriXMeVisLabBridge plugin has been loaded by OsiriX, customize the OsiriX toolbar by selecting Customize Toolbar… from the Format menu in OsiriX. Then simply drag and drop the Send to MeVisLab icon into the toolbar (Figure 1.2, “Adding a Send to MeVisLab icon to the OsiriX toolbar”).
© 2023 MeVisLab Community
| | | |
| Introduction |  | 1.2. Sending image series from OsiriX to MeVisLab |