| 1.2. Sending image series from OsiriX to MeVisLab | ||
|---|---|---|
 | Chapter 1. Integrating MeVisLab with OsiriX |  |
| 1.2. Sending image series from OsiriX to MeVisLab | ||
|---|---|---|
| | Chapter 1. Integrating MeVisLab with OsiriX | |
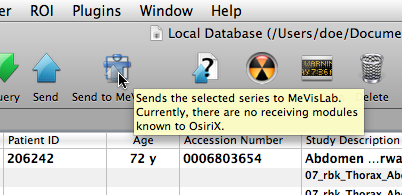
All interaction with the OsiriXMeVisLabBridge plugin is performed via the Send to MeVisLab toolbar icon. The icon’s appearance and tooltip indicate the current state of the connection between OsiriX and MeVisLab. If OsiriX does not detect any MeVisLab modules which are able to receive data, the arrow in the icon will be translucent (Figure 1.3, “OsiriX could not detect any OsiriXBridge modules”).
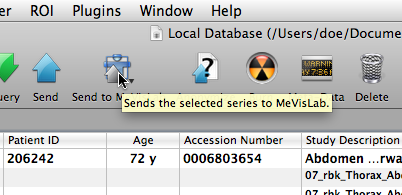
If at least one target module could be detected, the arrow will be shown fully opaque (Figure 1.4, “At least one OsiriXBridge module is available”).
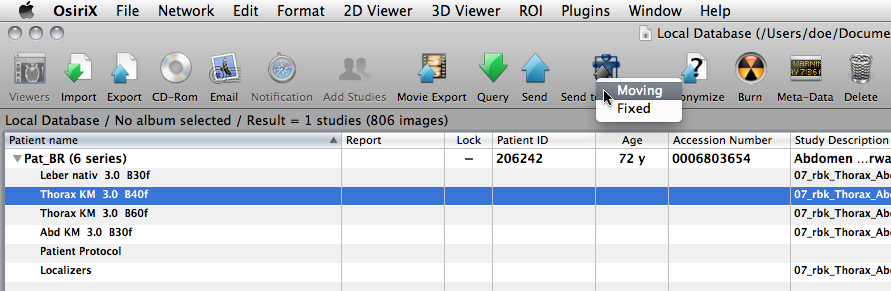
To send a specific set of images to MeVisLab select the name of the series you would like to send in the patient and study list. Then click on the Send to MeVisLab icon in the toolbar. A pop-up menu will open and allow the user to select one of the detected targets (Figure 1.5, “Sending a selected series via the target pop-up to MeVisLab”).
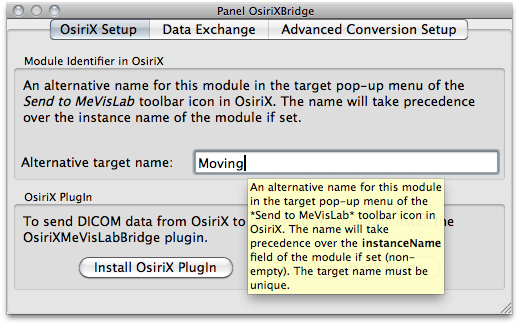
Each target represents one OsiriXBridge module or macro module that employs an OsiriXBridge module. The target name can be set in the module’s panel OsiriX Setup tab in MeVisLab (Figure 1.6, “Setup of the name of the target pop-up menu item in OsiriX”). Initially the instance name of the OsiriXBridge module is used as the target name but you are free to change that name to better reflect the targets meaning. Target names must be unique. If a target name has already been registered with OsiriX, the name is suffixed by a counting number.
© 2023 MeVisLab Community
| |  | |
| Chapter 1. Integrating MeVisLab with OsiriX |  | 1.3. Using MeVisLab to process images sent from OsiriX |