| 7.2. Creating the Applicator | ||
|---|---|---|
 | Chapter 7. Creating an Open Inventor Scene |  |
| 7.2. Creating the Applicator | ||
|---|---|---|
| | Chapter 7. Creating an Open Inventor Scene | |
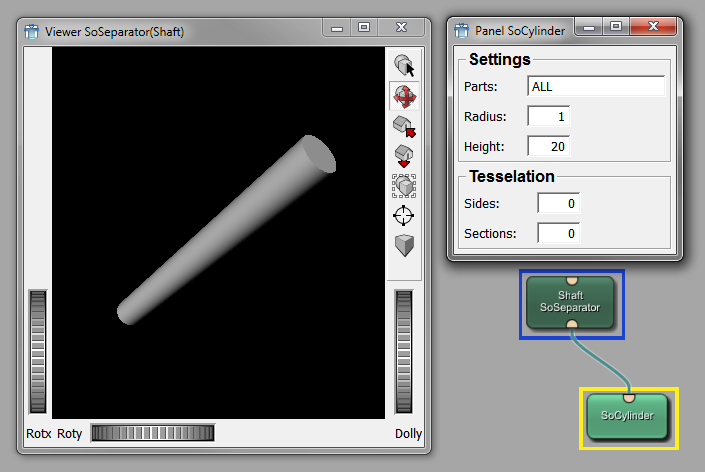
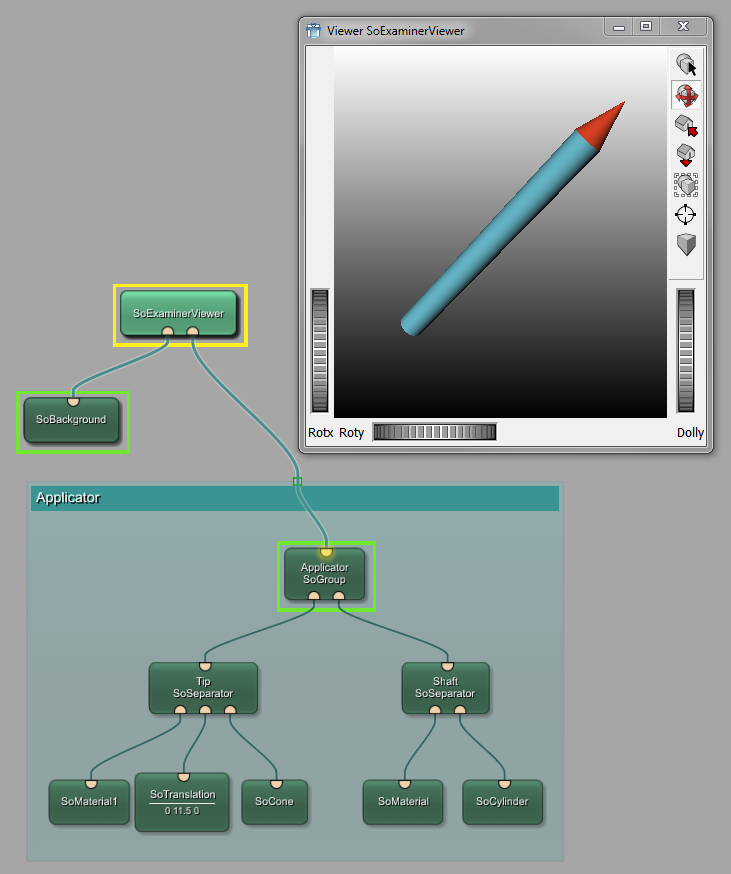
As a first element, we need the shaft of the applicator. For this, start by adding a SoCylinder module.
As we want to keep the applicator shaft and tip basically independent, we can already add a SoSeparator module here which comes with an in-built viewer. Connect the two modules and set the parameters for the cylinder.
![[Tip]](images/tip.png) | Tip |
|---|---|
Several Open Inventor modules come with an in-built viewer, like |
![[Note]](images/note.png) | Note |
|---|---|
Each of the viewers have their own persistent settings. So if you copy and paste such modules into another network, the zoom settings etc. will be those of the previously used state! If confused, always add fresh modules via the search or the Modules menu. |
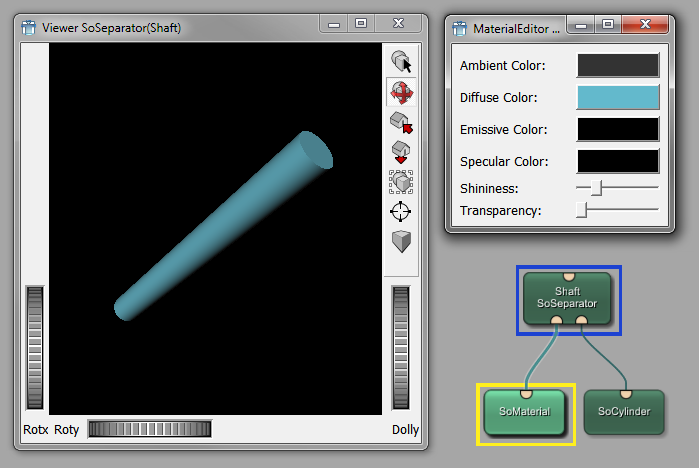
Usually, such Open Inventor objects will be colored. Add the SoMaterial module before the SoCylinder module and edit the material settings. Feel free to play around with the color settings.
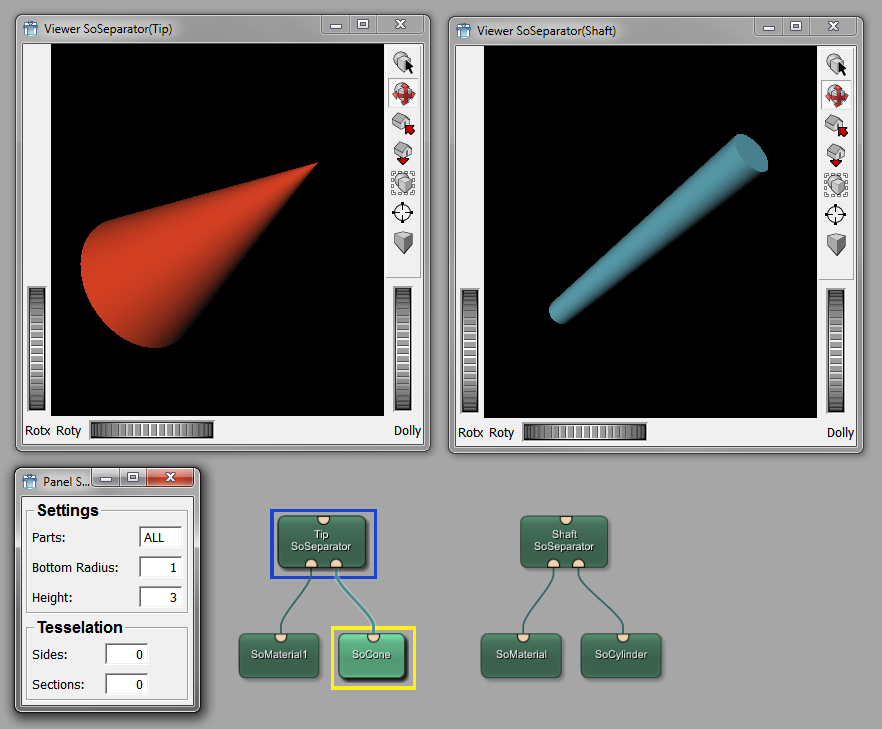
In a next step, we will create the applicator's tip. For this, add a SoCone module and also another SoMaterial and SoSeparator module to build a construction similar to the shaft.
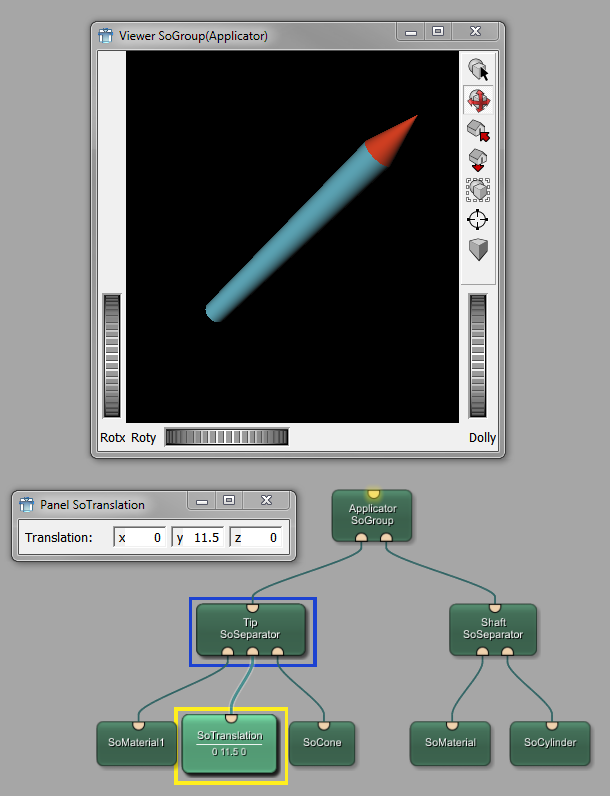
To combine the two independent elements (shaft and tip), we have to a) combine them and b) translate the tip (or shaft) in relation to the other, otherwise the two Open Inventor elements would be placed at the same position, namely the origin of the Inventor's world coordinate system [0,0,0]. (For more information on coordinate systems, see Chapter 12, Excursion: Image Processing in ML.)
For the translation, add a SoTranslation module in front of to the cone, and set the y-translation to (in this case) “11.5”. The SoGroup module has an in-built viewer, so that you can preview the resulting applicator. It can be rotated in the viewer.
For a finishing touch, add a SoExaminerViewer for display and a SoBackground. The latter adds a gray gradient background that gives a more 3-dimensional impression of the rendered Open Inventor scene.
For easier handling, create a group for the two parts of the applicator. Select the modules that belong to the applicator, right-click them and select Add to New Group. Enter an appropriate name like “applicator”. The new group appears in the workspace.
© 2026 MeVis Medical Solutions AG
| |  | |
| Chapter 7. Creating an Open Inventor Scene |  | 7.3. Creating the Interaction |