| 7.5. Finishing the Complete Open Inventor Scene | ||
|---|---|---|
 | Chapter 7. Creating an Open Inventor Scene |  |
| 7.5. Finishing the Complete Open Inventor Scene | ||
|---|---|---|
| | Chapter 7. Creating an Open Inventor Scene | |
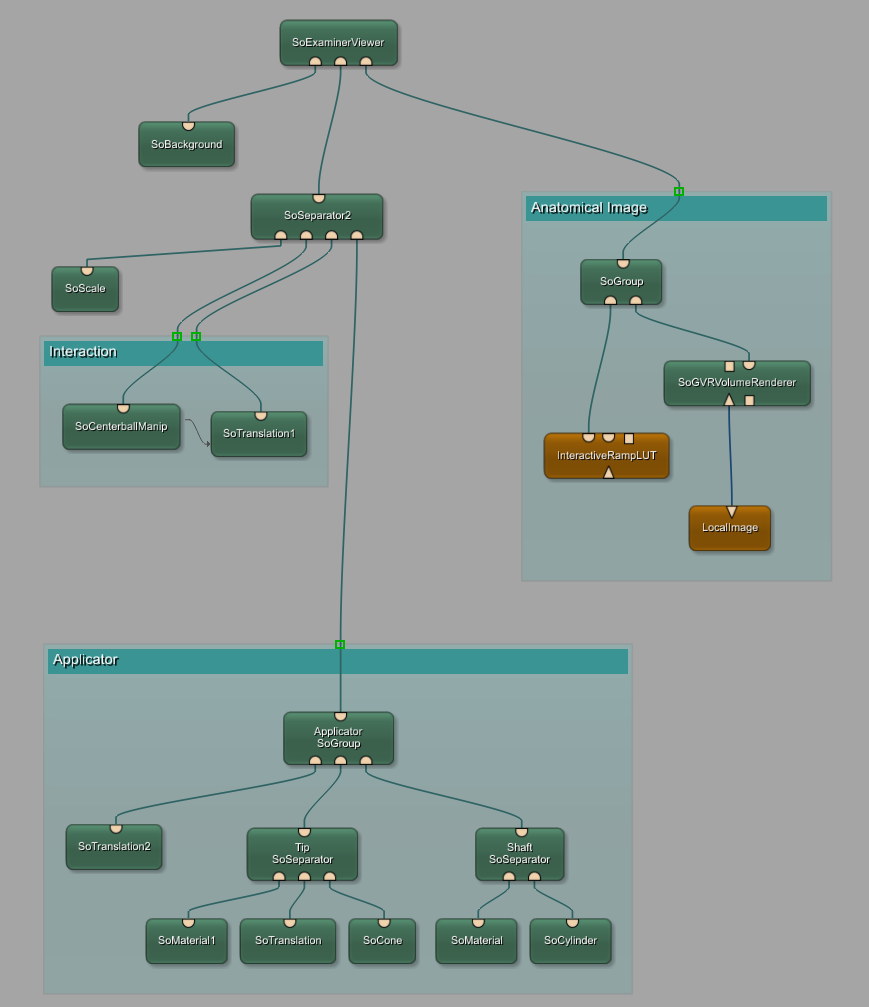
The three elements of the scene — applicator, interaction and anatomical image, preferably grouped, now have to be combined to result in one Open Inventor scene.
First, connect all three groups to the same SoExaminerViewer. Make sure that the applicator and its interaction sphere are connected via a separator.
![[Note]](images/note.png) | Note |
|---|---|
Because the scene with the anatomical image can be rendered with transparencies, add it right-most to the viewer so it is rendered last. |
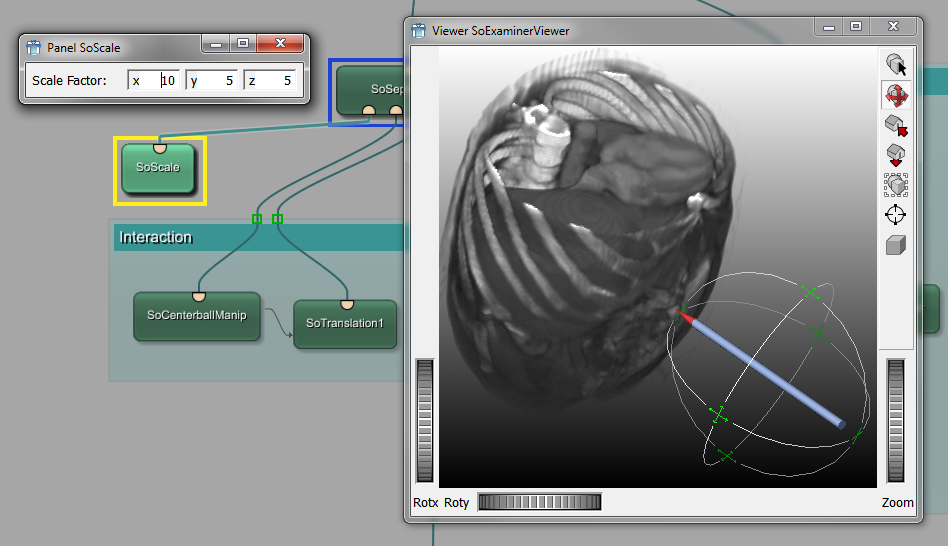
A look at the viewer tells us that the relative sizes of the graphic elements need to be aligned. This can be done by adding the scaling module SoScale, either to the applicator or the image. In our case, we will add it to the applicator, that means to the SoSeparator module. A scale factor of 10 in all directions is sufficient.
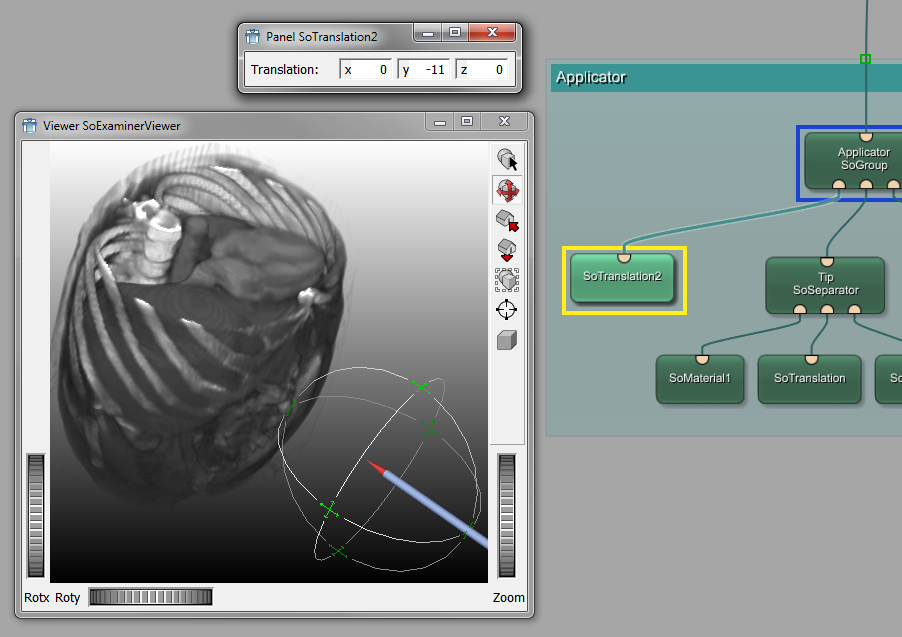
Then take the applicator and move it to the body to point at whatever spot you want to point at.
Looking at the result, it might not be the best idea to have the applicator tip at the edge of the sphere which is always aligned by its center. It may be sensible to place the tip into the sphere's center instead.
Add another SoTranslation module. It needs to have an effect on the applicator, so it needs to be added to the applicator's SoGroup module.
This is the end of this example. The full network is delivered with the demos of MeVisLab (available via Help → Welcome → more... → ApplicatorExample.mlab).
![[Tip]](images/tip.png) | Tip |
|---|---|
In the chapter Chapter 10, Developing a Macro Module for an Applicator, the applicator modules will be used as the starting point for programming a Python macro. |
© 2026 MeVis Medical Solutions AG
| |  | |
| 7.4. Creating the Anatomical Image |  | Chapter 8. Starting Development with Package Creation |